


Valorant’s Bind map is renowned for its unique design and dynamic tactical opportunities. As one of the most popular maps in the game, Bind offers a blend of open spaces, tight corridors, and teleporters, creating an exciting and unpredictable battlefield.
Mastering Bind strategies, understanding map callouts, and knowing key gameplay mechanics are essential for players who want to gain an edge in competitive matches.
In this Valorant Bind map guide, we’ll cover everything from map layout to essential callouts, effective tactics for both attackers and defenders, as well as the historical context and cultural elements behind the map. Let’s dive into the key features of Bind and explore how to dominate this map.
Overview of Bind Map in Valorant
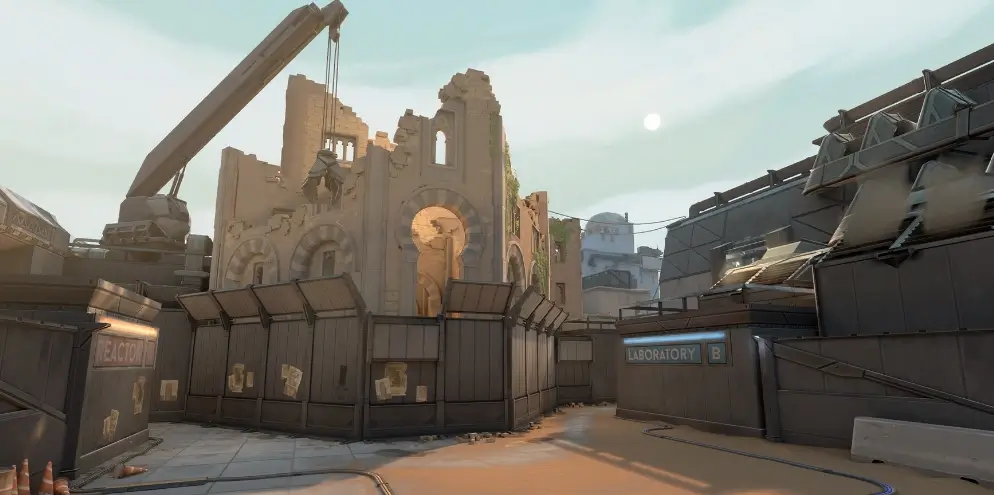
Bind is a desert-themed map set in a vibrant North African environment. With its two main bomb sites (A and B), the map provides a range of strategic opportunities. The teleporters that connect the two bomb sites are a defining feature, adding an element of unpredictability that requires quick adaptability from players.
Whether you’re attacking or defending, knowing the map layout and using it to your advantage can drastically improve your chances of victory. Bind is a map of contrasts, featuring wide open spaces on one hand and tight corners on the other, requiring players to think on their feet.
Bind Map Layout: Key Locations and Features
Bind is divided into two major bomb sites, A Site and B Site, with an intricate system of teleporters connecting them. Let’s break down the key locations within the map:
A Site – Key Entry Points and Tactical Considerations
A Site is located on the eastern side of Bind, offering attackers several potential entryways. The two primary access routes are A Short and A Bath, both of which have their own challenges and advantages. Defenders can control these paths using elevated positions such as A Heaven and A Tower, where they can hold angles and apply pressure on attackers.
A critical feature of A Site is its teleporter system, which connects to B Long. This allows defenders or attackers to rotate quickly, which is crucial for successful site control. Understanding how to control A Site requires a mix of aggressive defense, strategic utility usage, and quick reaction times.
B Site – Features and Tactical Insights
B Site is situated on the western side of Bind, with key areas such as Hookah and Garden providing both attackers and defenders with useful positional advantages. The teleporter from A Short exits at B Window, making it a critical spot for both teams to control. Attackers can enter through B Long or B Window, while defenders often secure the site from B Hall or B Elbow.
The complex layout of B Site features plenty of hidden spots, allowing defenders to surprise attackers. Success on B Site often comes down to timing, utility use, and team coordination.
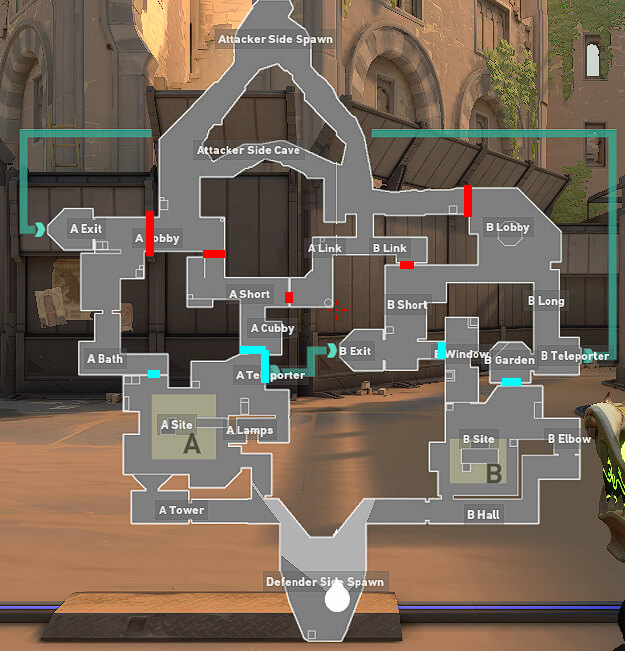
Callouts on Bind: Essential Communication Terms
Clear and accurate communication is paramount in Valorant, and knowing the key Bind callouts will help streamline your team’s coordination. Below are some of the most important callouts for both A Site and B Site:
A Site Callouts:
- A Short: Direct path leading to A Site.
- A Bath (also known as Showers): A secondary entry point to A Site.
- A Heaven: Elevated platform offering a strategic vantage point.
- A Tower: A high position for defending A Site from attackers.
B Site Callouts:
- B Long: The long corridor leading to B Site.
- Hookah: Elevated area near B Site.
- B Window: Exit point for the A Short teleporter.
- B Elbow: A corner near the entrance to B Site, key for defense.
Mid Callouts:
- Market: The central area connecting A and B Sites, often the location of intense combat.
- Fountain: A common gathering point near the Attacker’s Spawn, vital for mid-control.
Strategies for Attackers on Bind
As attackers, knowing when and how to use the teleporters effectively can give your team a major advantage. Here are some strategies to consider:
Using Teleporters for Surprise Attacks
One of the most unique aspects of Bind is the ability to use teleporters for quick rotations. Attackers can use the teleporter from A Short to B Window or B Long to A Lobby to create confusion among defenders and catch them off guard. Timing is everything when using teleporters; a well-coordinated push can throw off the enemy’s defense.
Site Splits: Divide and Conquer
Executing a site split is one of the most effective ways to overwhelm defenders. On A Site, splitting between A Short and A Bath forces defenders to cover multiple angles, increasing your team’s chances of success. Similarly, splitting between B Long and Hookah on B Site creates similar pressure. Successful site splits rely on perfect timing, team communication, and synchronized movements.
Defensive Strategies for Bind
Defending on Bind requires precision, timing, and the ability to read your enemies’ strategies. Here’s how to hold your ground effectively:
Holding Key Angles
Effective defenders know how to hold vital positions. For A Site, key spots like A Heaven and A Tower provide elevated views, giving defenders an advantage in covering attackers. On B Site, positions like B Elbow and Hookah offer defenders angles to disrupt incoming attacks.
Rotations Using Teleporters
On Bind, rotations are critical. When a site is under heavy attack, defenders can use teleporters to quickly reinforce other sites. For example, a defender at A Short can quickly rotate to B Window using the teleporter, shifting the balance of power in a crucial moment.
Cultural Elements and Lore of Bind
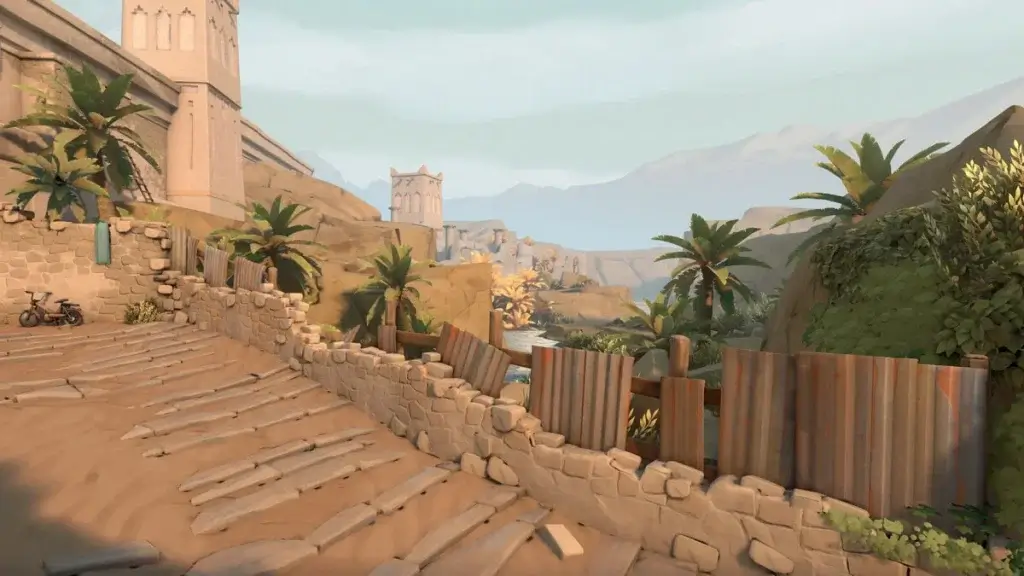
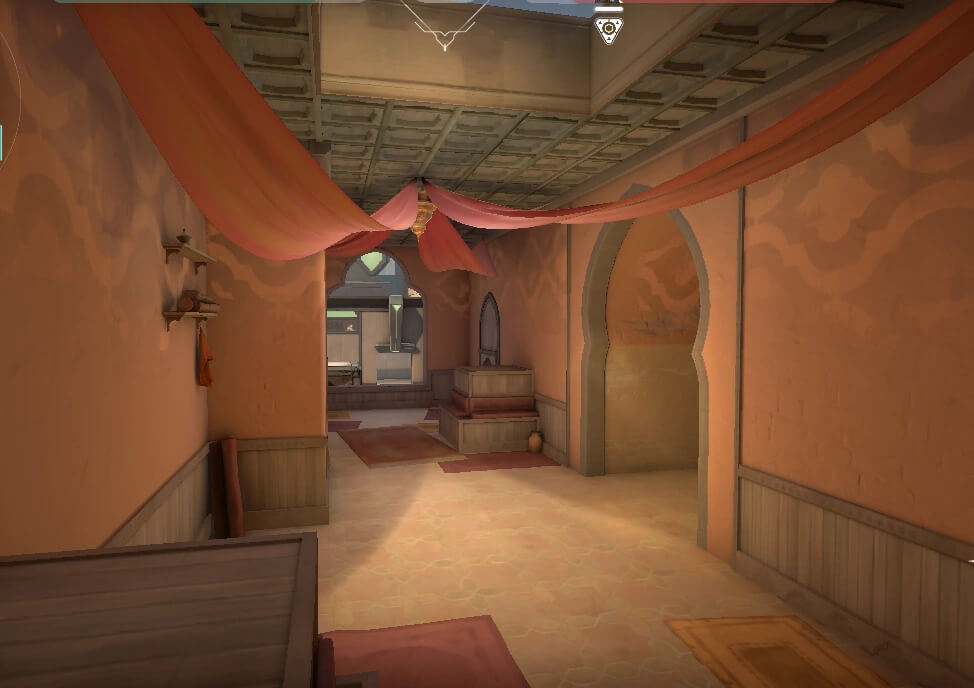
Bind’s design is inspired by North African architecture and culture, with locations like marketplaces, hookah lounges, and workshops reflecting the region’s rich history. These cultural elements not only provide a unique atmosphere but also influence the strategic design of the map, offering players an immersive experience.
The map’s lore centers around the Kingdom Corporation, a fictional entity exploiting the area for its radianite resources. Resistance against the corporation is evident throughout the map, and certain agents like Cypher, Yoru, and Raze share the locals’ resentment, adding depth to the narrative of Bind.
Tips and Tricks for Mastering Bind
To improve your game on Bind, here are some tips and tricks that can turn the tide in your favor:
- Use Smokes Effectively: Smokes can block key sightlines on A Short or B Long, giving your team safer entry routes.
- Flashbangs and Grenades: Using flashbangs or grenades can clear tight spaces like Hookah or A Bath, forcing defenders out of cover.
- Adapt to Your Opponents: Observing and adapting to your enemies’ playstyle can help you anticipate their moves. If they frequently use teleporters, set up ambushes to counter their rotations.
Recommendations Final
Mastering Bind requires an understanding of its strategic elements, map layout, and callouts. By practicing both attacking and defensive strategies, and utilizing teleporters at the right time, you can elevate your gameplay and gain a competitive advantage.
Bind is a map of constant adaptation, and being able to change your approach based on the enemy’s tactics will lead to more success in your matches.